本文由本人在 2022-1-21 11:37 发表于吾爱破解
之前看了《82岁老人用Excel画画,获奖无数还开画展!而你只会做表格》这个故事之后。忽然想到图片由像素构成,excel的sheet由单元格构成,
像素有颜色,单元格可以填充颜色。
也就是说: 像素<=>单元格;
那么我们就可以将图片每个像素的颜色读取出来,并根据像素坐标映射到excel对应的单元格中。
而且,python操作图片以及excel的库都比较成熟,应该很好操作
理论存在,那么就动手开干了。
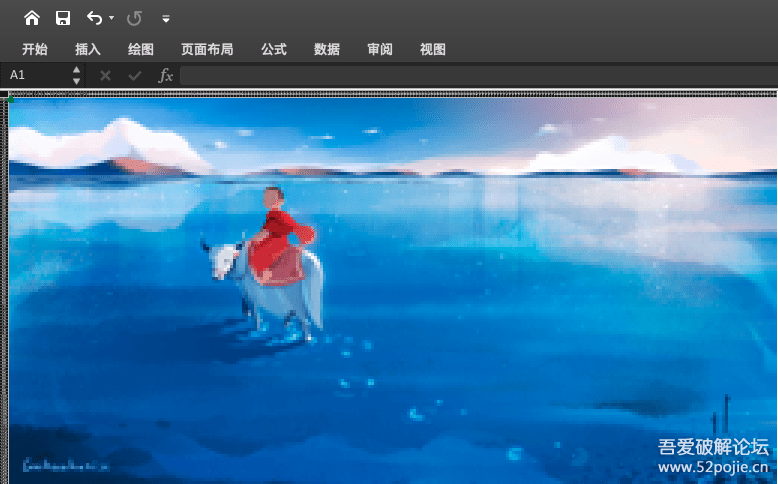
先看效果:
我这里用的是花瓣大神的图,大家可以换成自己喜欢的图


# - * - coding:utf-8 - * -
#  作者:Elias Cheung
#  编写时间:2022/1/20  14:42
import math
from xlwt import *
import xlwings as xw
from PIL import Image
from typing import Tuple


def resize_image(original_pic_path: str, resized_pic_path: str, max_resize_width: int = 256) -> Tuple[str, tuple]:
    """
    :param original_pic_path: 【输入】需要转换成excel单元格填充的原始图片A
    :param resized_pic_path: 【输出】经过缩放后的图片A
    :param max_resize_width: 缩放后图片的最大宽度,由于xlwings限制,不可超过256
    :return:
    """
    img = Image.open(original_pic_path)
    img_width, img_height = img.size

    #  以max_resize_width为基准比例,计算图片等比缩放后的宽高
    resize_width, resize_height = max_resize_width, math.ceil(img_height * max_resize_width / img_width)
    # print(resize_width, resize_height)
    resized_image = img.resize((resize_width, resize_height))
    resized_image.save(resized_pic_path)
    return resized_pic_path, (resize_width, resize_height)


def pixel_colour(image_path: str, image_size: tuple) -> list:
    """
    :param image_path: 经过缩放的图片的路径,可由resize_image()返回
    :param image_size: 经过缩放后的图片的宽高,可由resize_image()返回
    :return: 每个像素点的rgb点及对应的像素坐标
    """
    img = Image.open(image_path)
    img = img.convert('RGB')
    colour_list = img.load()

    img_width, img_height = image_size
    pixel_coordinates = [(i, j) for i in range(img_width) for j in range(img_height)]

    coordinates_and_colour_to_be_returned = [(colour_list[i, j], (i, j)) for i, j in pixel_coordinates]

    return coordinates_and_colour_to_be_returned


def create_excel(size: tuple, cell_width: int=2) -> str:
    """
    :param size: excel画布的尺寸
    :param cell_width: 每个单元格的宽度,不建议调整,此默认参数可将单个单元格大致调整为正方形
    :return: 创建并经过单元格调整的excel路径,默认为当前路径
    """
    cell_width = 256 * cell_width
    _book = Workbook(encoding="utf - 8")
    sheet = _book.add_sheet("picture", cell_overwrite_ok=True)
    for i in range(size[0]):
        first_col = sheet.col(i)
        first_col.width = cell_width
    book_name = "picture.xls"
    _book.save(book_name)
    return book_name


def draw_excel(excel: str, colour_and_cord: list):
    """
    :param excel: 创建并经过单元格调整的excel路径,默认为当前路径
    :param colour_and_cord: 每个单元格的rgb点及对应的像素坐标
    :return:
    """
    app = xw.App(visible=False, add_book=False)
    wb = app.books.open(excel)
    sht = wb.sheets[0]
    print(sht)
    for cell_info in colour_and_cord:
        r, g, b = cell_info[0]
        x, y = cell_info[1]
        try:
            sht.range((y + 1, x + 1), (y + 1, x + 1)).color = (r, g, b)
        except ValueError as e:
            # 在超过excel允许的最大列宽时出现此错误,一般由于resize_image()方法max_resize_width参数超过256时导致
            print(f"cell index out of range: {e}")
            continue
    wb.save("processed.xlsx")


if __name__ in "__main__":
    resized = resize_image(original_pic_path="kkk.jpeg", resized_pic_path="kkk.resize.png")
    print(resized)
    colours = pixel_colour(resized[0], resized[1])
    book = create_excel(resized[1])
    draw_excel(book, colours)


Comments NOTHING